Showing posts with label Digital Montage. Show all posts

Sunday, 28 April 2013

Making my montage


These are the scans I used to create my montage. I made sure they were all saved at the same resolution so that I could work with them all at the same size.
 
These are some old pictures and polaroids from my Dad's side of the family. There are pictures of him, his Sisters, his Mum and Dad and an old family pet of theirs.


These are some photos from my Mum's side of the family. There are pictures of her, her Sister, brother, Parents and also an old family pet.
 
Here are a couple of letters off my Nanna that I scanned in used parts of in the montage.


This is my sweet pea sketch that I used.

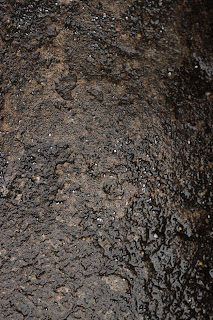
 This is a texture that I made myself and used in an image as seen on a previous post. However, this time I turned the paper over to the other side and scanned that side as the other side is a page of music. I screwed up a piece of paper, dipped it in tea, left it to dry and splatted with brown ink (demonstrated in previous post). I thought this would be a good texture to use in the montage as it gives quite an aged and weathered look to fit in with the old photos.


 To create the montage I used photoshop. Layers and layer masks were needed. I started off with the photos and placed them where I wanted them. Then I added bits of the texture image in the blank spaces that were at the top right and bottom left. If any of the texture overlapped the photos, I just created a layer mask and erased the texture away with 100% opacity and quite a low hardness. I used the multiply blending mode and lowered the opacity a little bit. I repeated this with the parts of the letter and the sweet pea drawing. With the letter, I just selected a couple of little bits from it and used free transform to enlarge it and rotate it how I wanted. I used part of the letter paper at the bottom left aswell.  


After flattening the layers, I noticed a couple of white parts so I used the clone stamp tool to clone some of the textured background and fill in the gaps.

Collecting and scanning

 
I started to go through our photo drawer, looking for childhood pictures of me and my family when I was little, as I planned on basing my digital montage on family and memories. I found lots of pictures that I've seen a million times before but then I came across some REALLY old photos that I've never seen before, of my Dad in his teenage years and also some of my Mum in her teenage years and younger!! These were really interesting to me and gave me an idea of their life, way before me and my sister were born and even before they had met each other! After discovering these, I decided to base my digital montage on family and my Parents' memories.
 
There were also pictures of my Grandparents when they were around the age that my Mum and Dad are now. Both my Grandads passed away before I was born so it was really nice to see what they were like and how much my parents look like them! My Dad's dad looks the spitting image of what my Dad looks like now! I have seen the odd picture of them before but not this many.
 
My Nanna (Dad's Mum) was around until I was about 8. We only saw her about 3 times a year as she lived in Carlisle but I have SO many fond memories of her and her house which me and my sister used to love. We also used to write letters to her and she'd write back.
 
My Grandma (Mum's Mum) is still here and looking at old photos of her is strange as she was very glamorous and ladylike by the looks of things. Now she is a very cheeky and funny old lady.
 
I really love looking at old pictures. I love how retro they look as they were obviously taken with film.
 
So....I collected some of the photos together and also some old letters off my Nanna.


First of all I arranged some of my Dad's old pictures together and stuck them with blue tack onto some paper. 

 
Then I scanned them in at a resolution of 300dpi.
 
 
I repeated this again with my Mum's old photos.


I then started to think about what else could go into the montage and what could fill some of the gaps. I wanted to include some references to me and my sister in there too, as we link these 2 people together. I always remember my Mum calling us 'sweet peas' when we were little. She used to play the piano and my Aunty (Dad's sister) was a singer and they wrote a song about me and my sister years ago and called it 'sweet peas'. I decided to do a quick sketch of some sweet peas so I could use that somewhere in the montage.


I thought it would be nice to use a letter off my Nanna in the montage too so scanned one in.
 
 
I also scanned in some various other things like some film negatives and some old calligraphy that my Dad wrote when he was a teenager which my Nanna had framed up on her wall until she passed away. As this was still in the frame, it was hard to scan and came out blurry so I used my DSLR to take a picture of it instead.


Friday, 12 April 2013

Hannah Hoch - Photomontage

 
 Hannah Höch  (1889-1978) was a German Dada artist. She was one of the pioneers of the art form, photomontage.
 
Most of her collages were political. Her pieces make statements about the beauty industry which at the time was gaining strong momentum in the media due to the rise of fashion photography and advertising. She also made strong statements about racial discrimination.


Saturday, 23 March 2013

Textured Montage

 
Yesterday, whilst shooting in the studio for some fashion photography, I took this shot of Bezma by accient but quite liked it and thought it could be used for something else. I forgot to adjust my camera settings, so this image was taken with a shutter speed of 4 seconds.


I added two textures that I took whilst on a trip out in Manchester the other week.
I changed the colours in the textures and layered them on to the image, decreasing the opacity so you can still the image underneath a little bit. With each texture, I added a layer mask and painted over where Bezma is so she's not been covered too much by the textures. I increased the opacity of the brush when going over her face and then decreased it a little bit whilst going over some space around here and then left the outsides. I then flattened the image but then tried something else on it. I duplicated the layer twice and on the middle layer, I increased the contrast and decreased the brightness so it looked darker. Then on the top layer, I created a layer mask and then painted around the edges of the images, revealing the darker image underneath.
 
 
I quite like the textures but not sure if they really go with the image as they are different colours so I tried it all again but tried to use all the same colours.


Thursday, 7 March 2013

Textured Montage

Today I experimented with textured montages. I took some portraits and then went out took some pictures of various textures that I could find.
 
I took a portrait of K in the studio and then used photoshop to layer the textures onto the image, making sure all of the images that I was putting together were the same resolution.

I started with this image of K...


I started with this texture of some wood.

 
I dragged the texture onto the picture of K whilst holding the shift key so that it lined up the 2 images correctly. Then I put the blending opacity to about 55%. Then I created a layer mask and uncovered K's face of the texture, using and opacity of 100%.

 
Next, I used this texture of graffiti on a wall.


I did the same with this layer, making sure his face was clear of the texture. However, when going over his hat and coat, I used a lower opacity so that some of the texture was showing. I played around with the blending modes to see what looked best.

 
With this texture of a grid cover, I used the gradient tool so that it was only showing on one part of the image. I created a layer mask then clicked on the gradient tool and chose the black to white option. Then I dragged the cursor from one side of the image to the other which made the grid show on only one side. I set the opacity to about 50% again and then created another layer mask on this layer to uncover his face of the grid texture.


This is the end result. As you can see, I added another little image of K in the bottom corner.


I did the same again with an image of Besma and some different textures.


 Ii changed it all to black and white as I thought it looked better.


Thursday, 7 February 2013

Digital image capture & editing - Still life & Homemade Texture

I wanted to play with textures more but this time create my own texture rather than using textures off the internet.
 
First I got one of my Mum's piano music books and ripped a page out......not really, she'd kill me. I photocopied a page from the book.


Then I ripped it round the edges and screwed it up and dipped it in tea. When it dried, I used some brown ink to give it more of a 'worn' look and splattered some in spots on too.


Then I scanned the texture onto the computer and saved it.


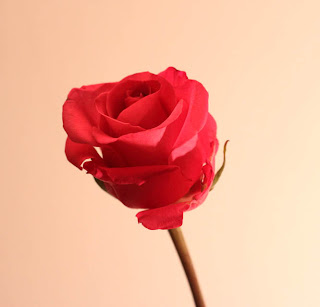
I used this image below that I took of a rose, and using photoshop, merged the texture with it.


This is the finished result. I changed it to a sepia colour as I thought it suited the style more.
 

Sunday, 20 January 2013

Digital image capture & editing - Textures


I took some photos of some still lifes (or lives) I set up in my dining room to have a mess around with textures again...


This is fun!


Digital image capture & editing - Memories

 
After the introduction to the montage project, I started to think about collecting some photos and textures that I can scan in and use for my memories montage.
 
When I think of the word 'memories', I think of my childhood and memories with family.
 
This (below) is one of my favourite childhood pictures of me and my big sister because it shows how close we were as kids and shows how I remember us being.
 
I used photoshop and layers to add a texture and changed the image to black and white to give it quite an old hazy feel, because I don't clearly remember being this age. (i'm not quite old enough to have had black and white photos!)


This is the original image.... I just used my phone to take a picture of the photo.


Friday, 18 January 2013

Photoshop - touching up


Today, I had a go at getting rid of some of the imperfections on this old photograph below on photoshop. 


First, I straightened up the actual image by using the ruler. I dragged a line across the top of the edge of the photo and then clicked image and image rotation and then selected arbitrary. The angle was already set to 3.12 which made the image straight.

To get rid of the little white ripped bit at the top right of the image, I used the lasso tool to roughly draw around it, move the selection just slightly above, clicked the move tool and duplicated it down by holding down the 'alt' key and dragging over where the rip was. 

With the other rip on the top left hand side, i used the lasso tool again to make a selection around it, then clicked edit, then fill and then selected content-aware on the drop down menu. 

To get rid of the coffee stains on the right hand side of the photo, I used the spot healing brush tool.

To get rid of the numbers and the white lines at the bottom of the photo, i used the clone stand tool. To get a sample from the surrounding grass, you press 'alt' and click and then stamp it over where you want to by just clicking. You have to keep sampling to make it as accurate as possible. When doing the white lines at the bottom, zooming right in was required as the lines go over the boy's shoes so you have to get nice and close.

This was the finished image. It's not the best as I did it quite quickly but it demonstrates what I did!


Friday, 11 January 2013

Photoshop - Fruit Man!


In todays session with Dave Gee, we had a go at using different images to create a montage in Photoshop.  


The tools I used for this exercise were; the elliptical marquee tool, the move tool and the magnetic lasso tool. I also needed to resize and rotate some of the images and duplicate some for the eyes, ears and hair.
 
FUN! :)