Sunday 28 April 2013

Making my montage


These are the scans I used to create my montage. I made sure they were all saved at the same resolution so that I could work with them all at the same size.
 
These are some old pictures and polaroids from my Dad's side of the family. There are pictures of him, his Sisters, his Mum and Dad and an old family pet of theirs.


These are some photos from my Mum's side of the family. There are pictures of her, her Sister, brother, Parents and also an old family pet.
 
Here are a couple of letters off my Nanna that I scanned in used parts of in the montage.


This is my sweet pea sketch that I used.

 This is a texture that I made myself and used in an image as seen on a previous post. However, this time I turned the paper over to the other side and scanned that side as the other side is a page of music. I screwed up a piece of paper, dipped it in tea, left it to dry and splatted with brown ink (demonstrated in previous post). I thought this would be a good texture to use in the montage as it gives quite an aged and weathered look to fit in with the old photos.


 To create the montage I used photoshop. Layers and layer masks were needed. I started off with the photos and placed them where I wanted them. Then I added bits of the texture image in the blank spaces that were at the top right and bottom left. If any of the texture overlapped the photos, I just created a layer mask and erased the texture away with 100% opacity and quite a low hardness. I used the multiply blending mode and lowered the opacity a little bit. I repeated this with the parts of the letter and the sweet pea drawing. With the letter, I just selected a couple of little bits from it and used free transform to enlarge it and rotate it how I wanted. I used part of the letter paper at the bottom left aswell.  


After flattening the layers, I noticed a couple of white parts so I used the clone stamp tool to clone some of the textured background and fill in the gaps.

Collecting and scanning

 
I started to go through our photo drawer, looking for childhood pictures of me and my family when I was little, as I planned on basing my digital montage on family and memories. I found lots of pictures that I've seen a million times before but then I came across some REALLY old photos that I've never seen before, of my Dad in his teenage years and also some of my Mum in her teenage years and younger!! These were really interesting to me and gave me an idea of their life, way before me and my sister were born and even before they had met each other! After discovering these, I decided to base my digital montage on family and my Parents' memories.
 
There were also pictures of my Grandparents when they were around the age that my Mum and Dad are now. Both my Grandads passed away before I was born so it was really nice to see what they were like and how much my parents look like them! My Dad's dad looks the spitting image of what my Dad looks like now! I have seen the odd picture of them before but not this many.
 
My Nanna (Dad's Mum) was around until I was about 8. We only saw her about 3 times a year as she lived in Carlisle but I have SO many fond memories of her and her house which me and my sister used to love. We also used to write letters to her and she'd write back.
 
My Grandma (Mum's Mum) is still here and looking at old photos of her is strange as she was very glamorous and ladylike by the looks of things. Now she is a very cheeky and funny old lady.
 
I really love looking at old pictures. I love how retro they look as they were obviously taken with film.
 
So....I collected some of the photos together and also some old letters off my Nanna.


First of all I arranged some of my Dad's old pictures together and stuck them with blue tack onto some paper. 

 
Then I scanned them in at a resolution of 300dpi.
 
 
I repeated this again with my Mum's old photos.


I then started to think about what else could go into the montage and what could fill some of the gaps. I wanted to include some references to me and my sister in there too, as we link these 2 people together. I always remember my Mum calling us 'sweet peas' when we were little. She used to play the piano and my Aunty (Dad's sister) was a singer and they wrote a song about me and my sister years ago and called it 'sweet peas'. I decided to do a quick sketch of some sweet peas so I could use that somewhere in the montage.


I thought it would be nice to use a letter off my Nanna in the montage too so scanned one in.
 
 
I also scanned in some various other things like some film negatives and some old calligraphy that my Dad wrote when he was a teenager which my Nanna had framed up on her wall until she passed away. As this was still in the frame, it was hard to scan and came out blurry so I used my DSLR to take a picture of it instead.


Friday 26 April 2013

Large Format


Large format cameras are anything that uses 5x4" film or larger. Because the film is so large,  you don't have to enlarge it so much These cameras are very flexible and you have full control of your image, however they are quite heavy and bulky and not easy to carry around so are mainly used in a studio environment.

They consist of:

  • a metal plate with the lens and shutter
  • a standard at the front and the back
  • a set of bellows to attach the two (extended for macro and compressed for landscape)
  • a frame that holds the focusing screen and allows the sheet film holder to be inserted

Different kinds of films are needed for different light conditions are there is no colour balance setting. Film needs to be loaded individually after each exposure.


When photographing architecture, the image can be distorted by just tilting the camera upwards. However, the front and back standard of the camera can be lowered and raised. instead of tilting it, you would raise the front and lower the back so that the lens and film are still parallel with the building causing no distortion and converging verticals.


The focusing screen is made from glass. The image will appear upside down and can only really be seen properly in the dark (hence the cover that people put over their heads in the olden days!). 

To chance from landscape to portrait or vise versa, you don't have to 


Wednesday 24 April 2013

Photographic Media - Shoot images

Here are some of the images from the shoot. In this post I will evaluate the images and explain how I processed them.

I used photoshop to edit the images. For most of the images, I have increased the contrast and used levels to exaggerate the shadows and highlights as I wanted quite a harsh and powerful result. Also, as the back wall wasn't lit, I could see some of the flaws in the wall such as small marks and cracks, so I used layers and layer masks. I would duplicate the background twice, use Gaussian blur on the middle layer and then on the top layer, create a layer mask. Then, I'd use the brush to paint over just the background, revealing the blurred background from the middle layer, being careful not to go over any of Paul. This gave a nice flawless background whilst keeping Paul crystal clear.


                                                    © Holly Bailey

         This is my favourite image from the shoot. This particular pose shows off lots of different muscles in his upper body. I like the contrast that has been created by the lights, however I did adjust the levels in photoshop to really exaggerate the shadows and highlights, creating lots more definition in his muscles. I took this shot head on and at eye level to create a kind of symmetry. I purposely didn't light the white wall as I wanted this grey looking background which makes him stand out more.


                                              © Holly Bailey

 I told Paul to bring along some weights to pump up before the shoot.....but also to use as a prop during the shoot. I directed him to face his back towards the main light and look down to his forearm. The beauty dish here is illuminating his back and creating shadows and definition on his flexing arm muscles. I did zoom the lens for this shot but I also cropped even further into the image at editing stage, as I wanted the main focus to be on his back and left arm.


                                                          © Holly Bailey

 For this shot, I got him to sit on a step ladder and lean his crossed arms on a stool in front of him. You can clearly see the effects of the honey comb light at the back if you look at our left hand side of Paul. There is a slight highlight on the side of his face and on his shoulder.


© Holly Bailey

I used the stool for him to sit on and a step ladder for his left foot to rest on so he could rest his elbow on his raised leg and then rest his head on his hand. This pose gave some nice shapes and also shows his body from a different angle. Again, there is a nice highlight on his back due to the honeycomb at the back.


© Holly Bailey

This pose shows the muscles in his back and also on his arm. At this point, I turned off the honeycomb light and just used the main light with the beauty dish. This gave a shadow at one side of him, creating more of a contrast between him and the background. 

© Holly Bailey

Again, I have tweaked the levels a little bit more for this one to really exaggerate the definition. There are some strong shadows on the left side, which show the contours of his muscles.


© Holly Bailey

For this one, I intended to pose him so that we could see his triceps and the muscles above his ribs (obliques). I told him to pretend his is rubbing his right shoulder with his left hand and then hold his elbow......it looked quite un-natural as he grabbed his elbow to firmly but I wanted it to look quite relaxed and natural (he has never modelled before!). So to try and get more of a natural look, I told him to touch his elbow after the count of 3 and then I would take the picture. This looked a lot better so I am pleased with the image now.


© Holly Bailey


© Holly Bailey

I wanted to focus on his back for this shot. I cropped in closer so that his back fills most of the frame, cropping off part of his head and more of the bottom of the image.


© Holly Bailey

I asked Paul to bring along a black t-shirt to use as a prop. I asked him to hold it in certain ways that showed off his arm muscles.


© Holly Bailey


© Holly Bailey

I think I went over board with the levels and contrast in this image as detail at the bottom of the image is totally gone and is too dark. I do like the top half of the image though. I like this one because of his natural expression.


© Holly Bailey


© Holly Bailey


© Holly Bailey

Looking at this one, I should have cropped a little bit more from the top of the image as it doesn't look very balanced. It looks like he is slipping down the frame.


© Holly Bailey


Monday 22 April 2013

Cyanotype

Cyanotype is a historic photographic printing process that produces a cyan blue print.


 It is quite a cheap and easy process and is traditionally done with film negatives. However, when I tried this process, I used a digital image that I'd taken.
First of all I prepared the paper. Cartridge paper is used as it is quite durable, can cope with water well and has a nice texture to it. The chemicals needed for the process are potassium ferricyanide and ammonium ferriccitrate. I poured equal quantities into a dish and then brushed the solution over the paper evenly. Once dried, the paper becomes light sensitive, so I put it into a dark cupboard whilst it dried.
Whilst waiting for my paper to dry I chose an image that I thought would suit this effect and that was quite high in contrast. I opened the image in photoshop, changed it to black and white and then inverted it so that it became a negative image. Then, I printed the image onto acetate and this acted as a film negative.
I haven't yet done the next step because there wasn't enough equipment for everyone to do it but I'll talk about what I'll do next....
To complete the process I need to clip the acetate between a piece of glass and some board and then leave it exposed to UV light for about 10 mins (either sunlight or an electric UV light) or until the paper appears a kind of dark green colour. Then the paper needs to be rinsed with water. The parts of the image that were shadowed from the UV light by the dark parts of the acetate print should appear white and the exposed parts should be a cyan blue colour.
Results to come...  


It is a really sunny day today, so i only had to expose it to the light for about 4 - 5 minutes.


Here are the acetate negatives and the final result after rinsing them with cold water 


Friday 12 April 2013

Hannah Hoch - Photomontage

 
 Hannah Höch  (1889-1978) was a German Dada artist. She was one of the pioneers of the art form, photomontage.
 
Most of her collages were political. Her pieces make statements about the beauty industry which at the time was gaining strong momentum in the media due to the rise of fashion photography and advertising. She also made strong statements about racial discrimination.


Photographic Media - Shoot planning

My shoot will take place in a studio and I will be using my digital camera. I am choosing digital as apposed to film for convenience as there are less variables to control and I will be working at quite a fast pace. Also, in this case, only the digital files are required for the client (Paul, the model), not prints. I will get my desired results from using digital a lot quicker and easier than if I was to use film. Post processing will be quicker too by using photoshop.
 
If I chose to do a landscape shoot, I would have considered using film, as I do prefer the tones and colours that can be created with film but the main purpose of my shoot is to show shape, texture and definition rather than colour, so the majority of the images will be black and white. 
 
Film can also look quite grainy, but I want my shots to look clean, crisp and modern.
 
The problem I might have with shooting with digital is highlights. Highlights can be easily overexposed if using digital and appear pure white with no colour or tonal information. I will need to consider my lighting and meter them correctly according to my camera settings to get the right exposure.  
 
The cost also has a part to play in my decision to use digital. The cost for film is a lot more expensive and there is less room for mistakes.  
 
So, I will be shooting images of Paul, a personal trainer who has been doing a strict 10 week diet and training plan. Paul wants a set of images to show the results on his body at the end of the 10 weeks. I will use certain lighting techniques combined with different poses to best show off the tone and definition in his body muscle. Paul would like the images to promote this kind of diet and training plan to his clients. I aim to produce images that convey how his body looks now after all the hard work so that it will make other people desire to look like that too and try out the plan for themselves.
 
 
I am already aware of how to light this sort of subject, as explained in earlier studio photography posts. However, I have never done this kind of shoot before where the main subject is just one (topless) man and the purpose of the shoot is to show off the tone and muscle in his body and Paul has certainly never done anything like this before, so I have done some research on male models and what kind of poses I could try in order to portray this. I also have some ideas of my own that I will try.
 
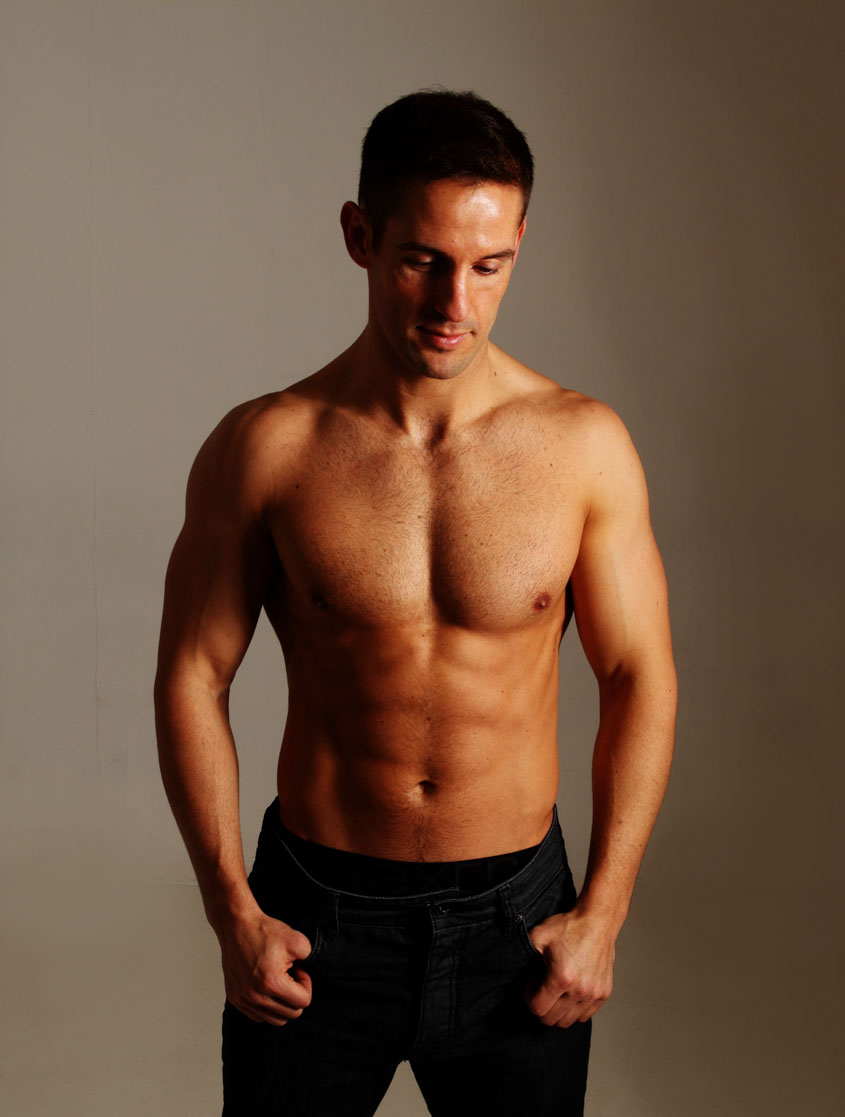
Here are some images I looked at for inspiration..


As you can see, the lighting and the poses used, really exaggerates muscle definition which is what I aim to do. However, Paul is not an underwear model and I hope to produce images that look a lot more natural than these!!


I will be shooting on a plain white background using my Canon EOS 500D and a 24-70mm f2.8 lens. I have chose to use this lens as it is a great all round lens and is good for portraits. It can go to quite a wide angle so that I can get some full length shots of Paul without having to stand at the other side of the room and it has enough zoom for me to focus on certain areas that I want the focus to be on.
 
I will shoot consistently on f11 as I think that this is the most appropriate aperture for this kind of shoot because everything will be in focus. I will meter the main light to f/11 and the other light to about f/16 to ensure I get the correct exposure. I am aiming for quite moody lighting with lots of contrast.

When it comes to colour space settings, I always shoot in sRGB rather than Adobe RGB because I feel that I get accurate, saturated colours, whereas if I was to shoot in Adobe RGB, the colours would appear duller to me because it squeezes colours into a smaller range before recording them to a file as it has a larger range of colours than sRGB. Special smart software is then needed to expand the colours back to where they should be when opening the file. So basically, shooting in sRGB for me is a lot less hassle. It fits in with my simplified workflow and I still get the colours I want. Also, as I am shooting specifically just for digital images and not to print, sRGB will display the colours correctly digitally on a computer monitor because the monitor can read a lot more of the colours in the sRGB gamut than the Adobe RGB gamut. If I was to shoot in Adobe RGB, I'd have to use special software to convert to sRGB in order for it to display correctly on the screen.  After explaining why I shoot in sRGB, like I explained earlier, I think the majority of my images for this particular shoot will me monochrome.
 
This shoot will require a certain lighting technique to achieve the results I want. I will use just 2 lights with modifiers to create these effects and a flash trigger.
My main light will be to one side with a beauty dish. I have decided to go for a beauty dish so that the light can be focused on the model and nowhere else and also because it gives quite a dramatic light which will work well with the style i'm trying to achieve. I will position the other light at the other side of the model, pointing at him but further back.

Here is a diagram of the setup I plan on using